Hey Filmos!
This is a tutorial for a small scenario where you are going to shoot a loose mid-shot and cover it with some MCU (medium close-up) if you are shooting a presenter, a documentary interview, or a model with some product for a TVC or product promo. This tutorial differs from an exterior setup or a bigger studio setup, which I’ll cover in another blog.
I’m going to start with what many cameramen and camerawomen consider the most important light in most setups: the backlight. If you’re going to have one source of light that picks out the whole scene and that you can bounce back in from the front, the backlight is really your number one choice.
The backlight is how you make your subject stand out from the background and give it depth and dimension. In the past, backlights were typically hard (coming from a directional source), and you would use a controllable unit with barn doors, like a 2k Fresnel, 650, or Dido, to achieve this effect.
While those hard lamps create an edge on your subject, they can give you hard lines across the face in the hair and on the shoulders. But in a situation where you really need control, the hard backlight can make sense.
But a soft backlight normally looks prettier, and this can be done by adding some diffusion to that hard lamp. We have a whole new range of lamps we can use to create a soft backlight and that are easy to set up though. One of these is the light tube, like the Nanlight Pavo tube, Astera Titan tube, or Aputure tube light.
The light tube is an easy way to get a soft backlight over the top and behind someone’s head. With the LED technology, you can decide whether you want that to be a neutral backlight, a little bit warm, or a bit cool. For a friendly and approachable vibe, I would recommend going a little bit warm to begin with.
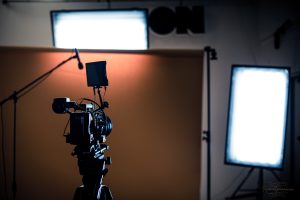
Another way to get that softer backlight is to have a light panel with a softbox.
Most DOPs/operators would set this up by placing the light over the back of the subject on a C stand/arm that can be just half a metre behind the subject. Don’t forget the sandbag on that c stand.
Alternatively, have a bigger source further back. This does cover the whole body and objects in the background, but it looks a little bit harder. If you’re using a roll of Colorama paper or studio background (flat), you can have the light stand behind your backdrop, and the lamp coming over the top of it.
The second most important light for your interview set-up is, of course, the key light, and this can really be any light, depending on your preference as director of photography. But the safest and most beautiful method for your key is to have a large soft source that is as large as your budget allows and can fit into the room that you’re working in. However, if you’re looking for an accessible and easy-to-set-up option, a light panel with a softbox on the front, such as the Aperture F22, is ideal as it is relatively small but creates a lovely, soft light. You can also use a panel with or without a softbox. The next step up, is something like the Aputure 300X with a 1m dome on the front. However, if you go up to an even larger dome, you can create a more beautiful, soft light, but it is often too big to manage a small room.
Another option for a key source is using a trace frame (diffusion) with a hard source through it and this can be one of your cob LED lamps or something like a 1K fresnel or a 2K fresnel or the good old Blondie, but all of those older style tungsten lamps may need some gel on the front to colour balance them to the right colour temperature, and they draw a lot more power so using LEDs really does save your bacon if you’re working on location as they will keep your setup simpler, cooler and they’re not going to overload the house circuit.
One final method cameramen and camerawomen often use for key source is to use a soft bounce board like a large piece of polystyrene or the California sun bounce if you have the budget, and you can fire a lamp into that and have that bouncing back into the subject. A bounce source can be beautiful as it has its own soft quality.
Now that your backlight beautifully edges your subject and your soft key light wraps around that face, you can think about getting in some fill light. Fill light can be something as simple as a flexible reflector, California sun bounce, or a piece of poly, so move it in and add just as much as looks good to your eye. Keeping mind It can be nice to have no fill or even to have negative fill (black) to give more contrast in the face.
The last lamp is for the background. If you’ve got a textured one like a brick wall or the interior of the house for example, a hard source is going to be useful. Add it an angle, raking across that textured background to give you some hotspots and some dark areas, which will give you a dynamic out-of-focus background for your subject.
The background light can be a soft source as long as you can control it and stop it from spilling on your talent and other places that you don’t wanna see it, so if you are using a soft source on the background, either have it close and just out of the edge of the frame or further back and use a cutter to keep light spilling onto your talent.
If you want to get really arty, you can use a series of tube lights scattered around, even hidden behind items in the background, to give some colour spots and hotspots here and there.
Finally, before you shoot, while watching your monitor have a play with the intensity of each lamp using the dimmers to get the balance between each light source.
If you have any questions, please leave a comment. Ngā Mihi rich.